Instead of having a normal light switch in my new bathroom I wanted to have a touch switch hidden behind the wall tiles so that the light could be turned on and off by simply touching a tile, and as with all the other lights in the house, I wanted it to integrate with the Rako home automation system I’m using.
Rako don’t currently make any touch sensors, but they do make a “volt free contact” radio module, which allows external devices to send Rako commands by simply shorting one of seven wires to a common eighth wire to indicate which of the seven commands should be sent (Scene 1-4, Off, Raise, Lower). Using one of these I could make my own touch sensor and still integrate it with the rest of the house.
Specification
This is what I needed:
- Reliably detect touch through 10mm of porcelain tile + adhesive.
- Sensor to be extremely reliable as it would be impossible to service once it’s embedded in the wall.
- Ideally the behaviour should be modifiable, so upgradable firmware would be good.
- Implement the same interface as the other light switches in the house: touch once for on, touch again for off, touch and hold to dim up, touch and hold again to dim down.
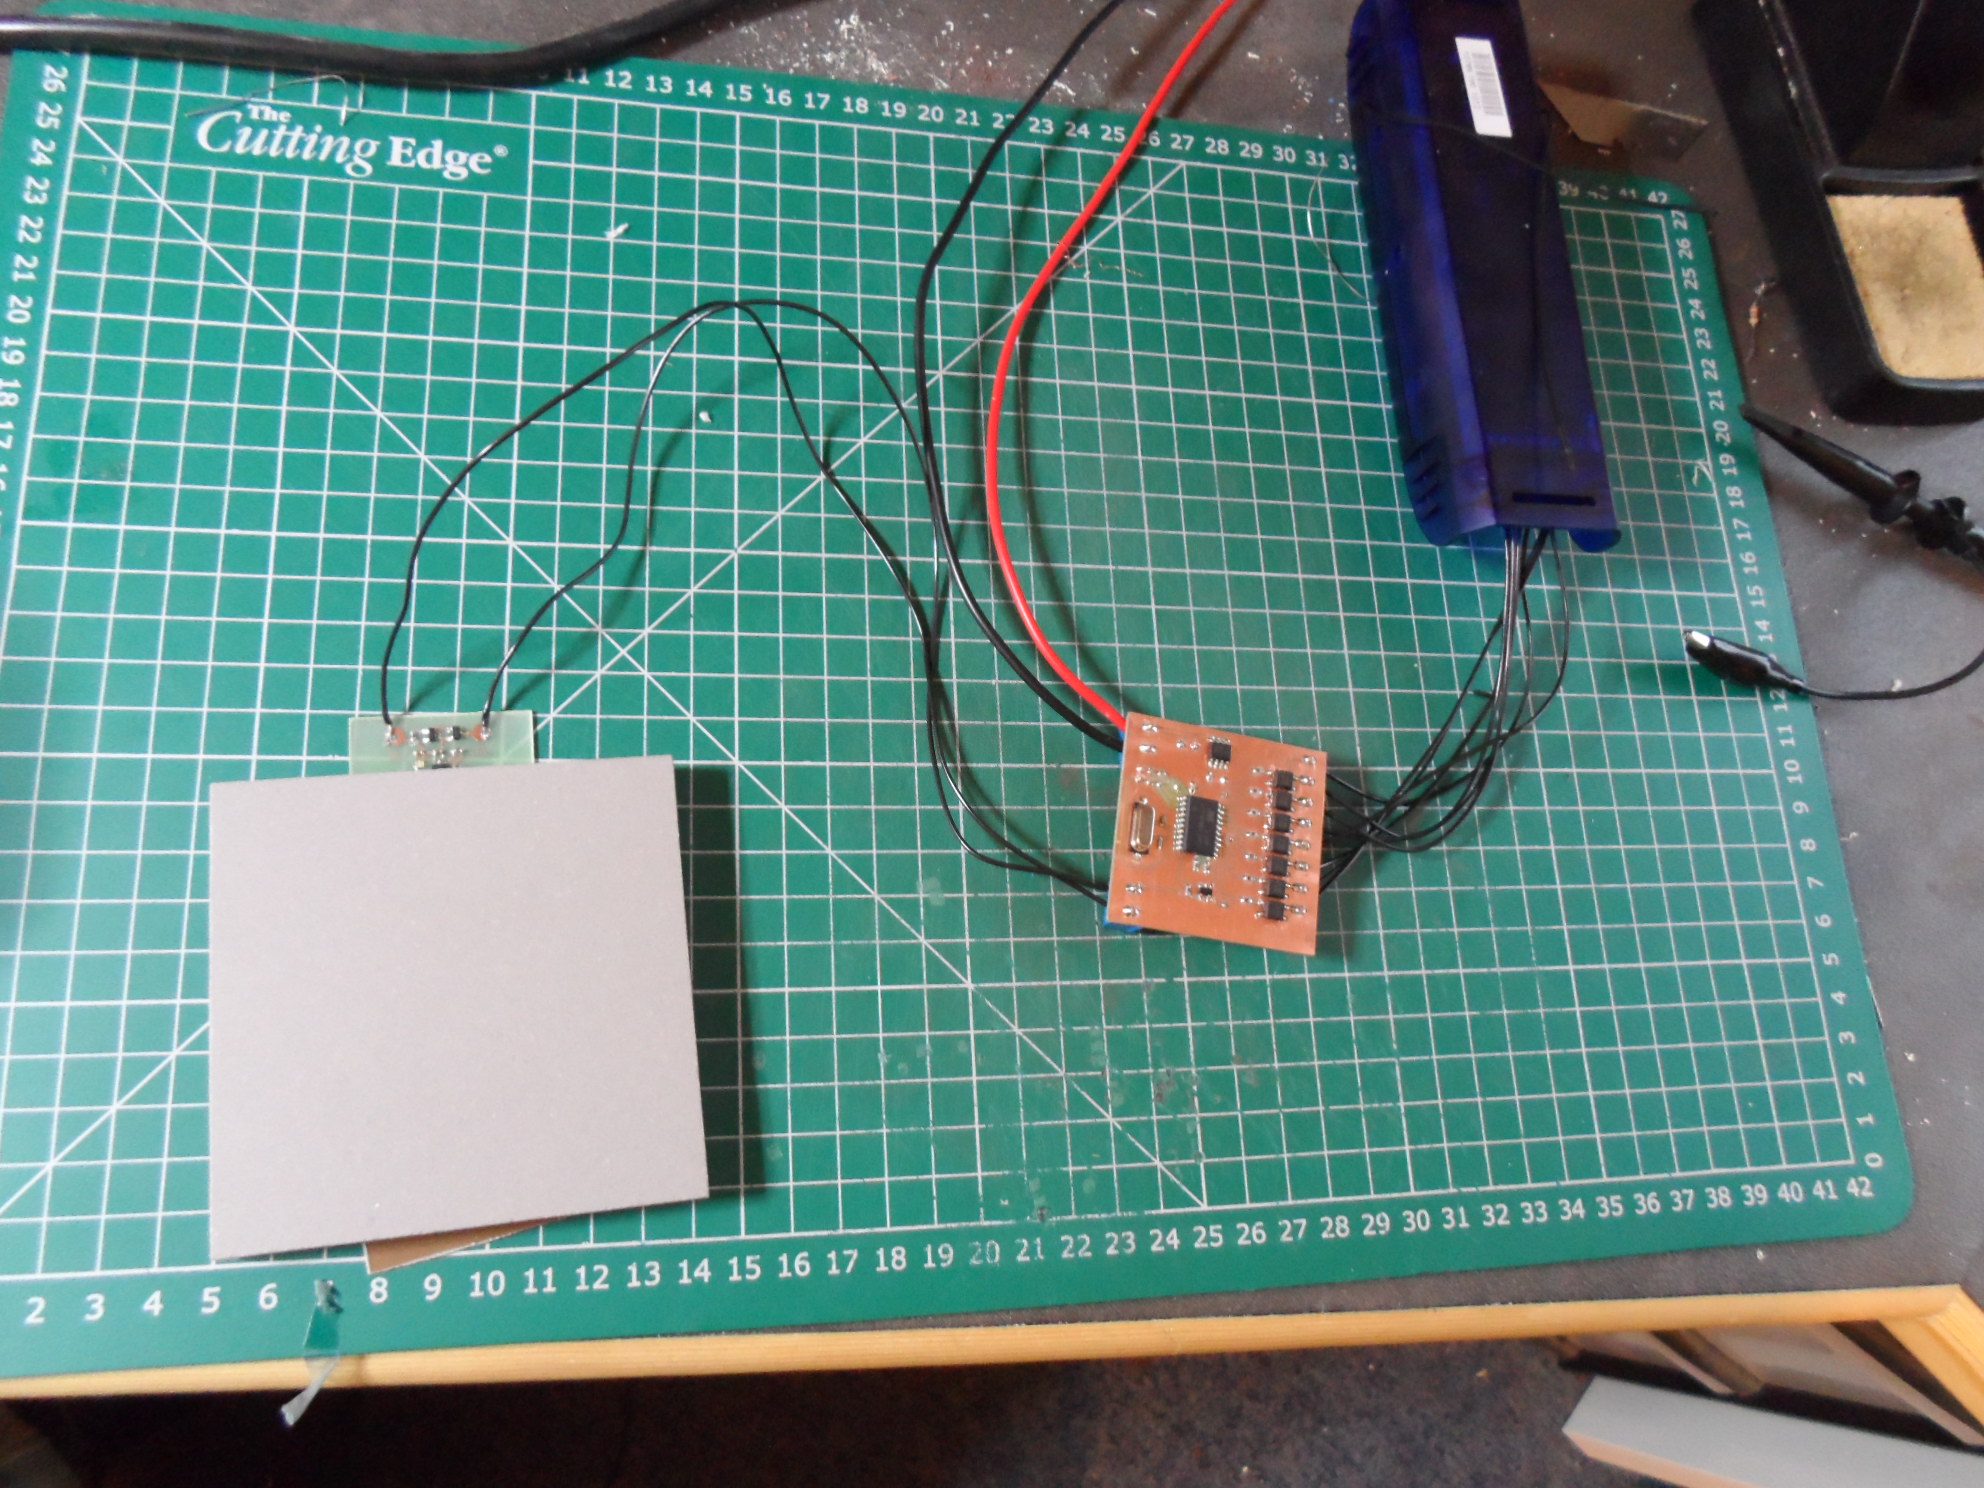
To achieve the above I decided to split the design into two pieces. The first, a very simple and (hopefully) ultra reliable sensor to be embedded in the wall, which would be based around an Atmel AT42QT1011 single button touch sensor IC. The second part being a controller to interface between the sensor and the Rako radio module, that could be placed in an accessible location for upgrades and/or maintenance.
Touch Sensor
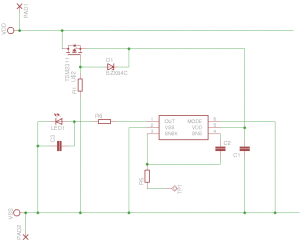
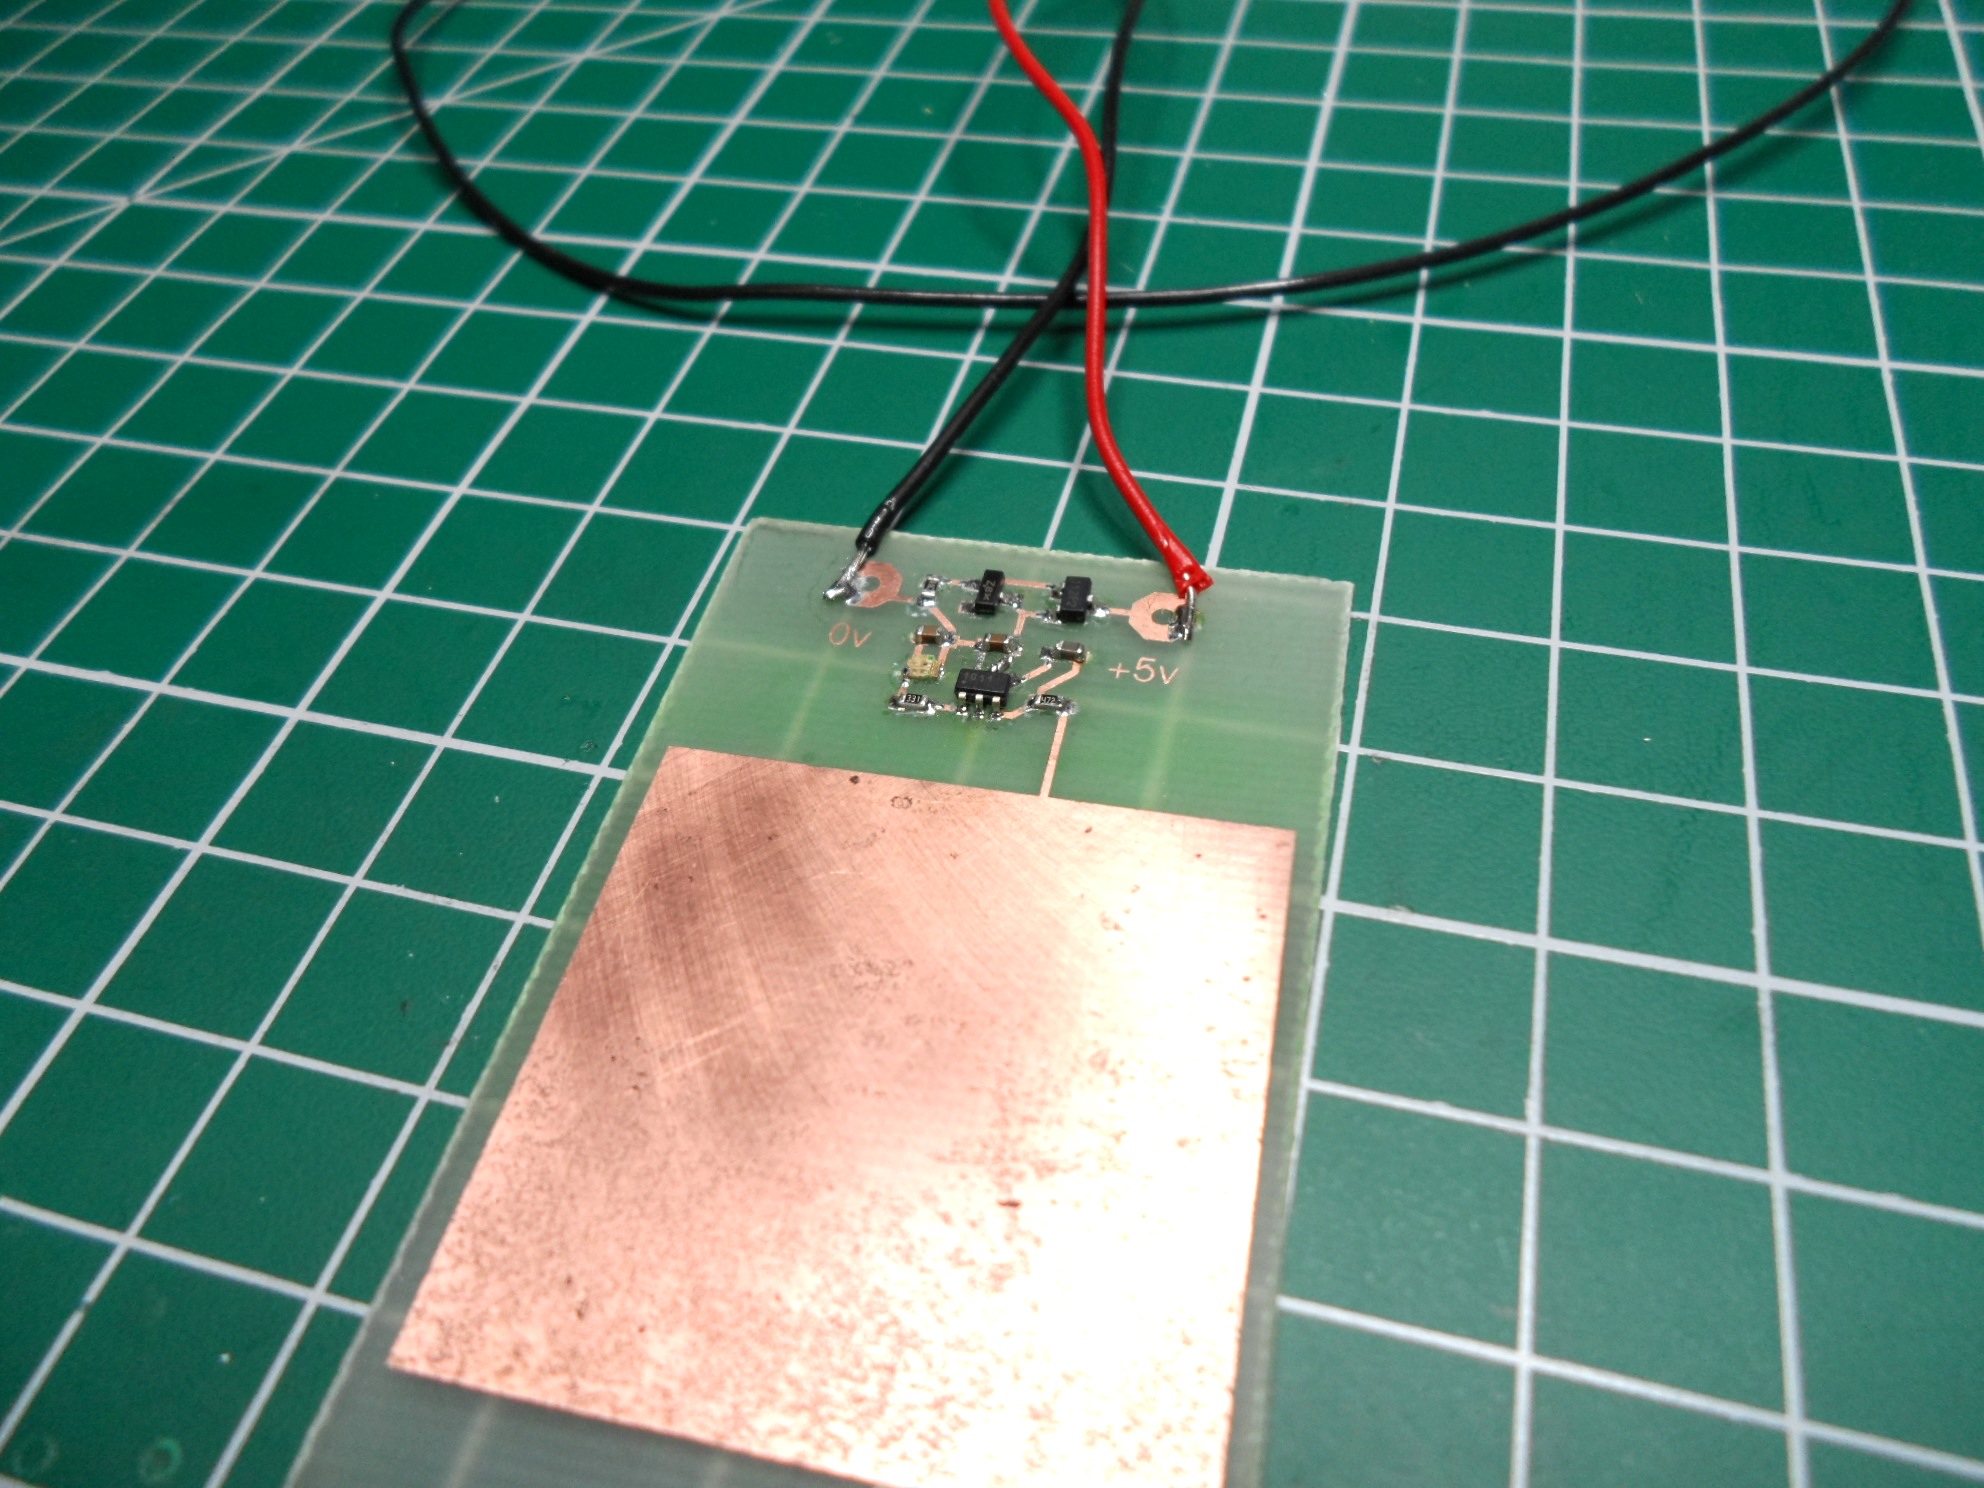
By using the Atmel IC, the sensor is extremely simple, only using nine components.
There are only two wires going to the sensor, +5 volts and ground which provide it with power. Activation of the sensor is signalled on the same pair of wires simply by drawing more current. Specifically, it illuminates an LED, which while it will never be seen, causes the circuit to draw ten times more current when it’s activated than when it’s not. To increase reliability the LED could be replaced with a zero ohm resistor and capacitor C3 could be removed, just leaving the current limiting resistor.
The circuit is almost unmodified from the Atmel datasheet, the only notable change being the addition of the MOSFET, diode and resistor at the top of the schematic which protect the circuit from reverse polarity.
Controller
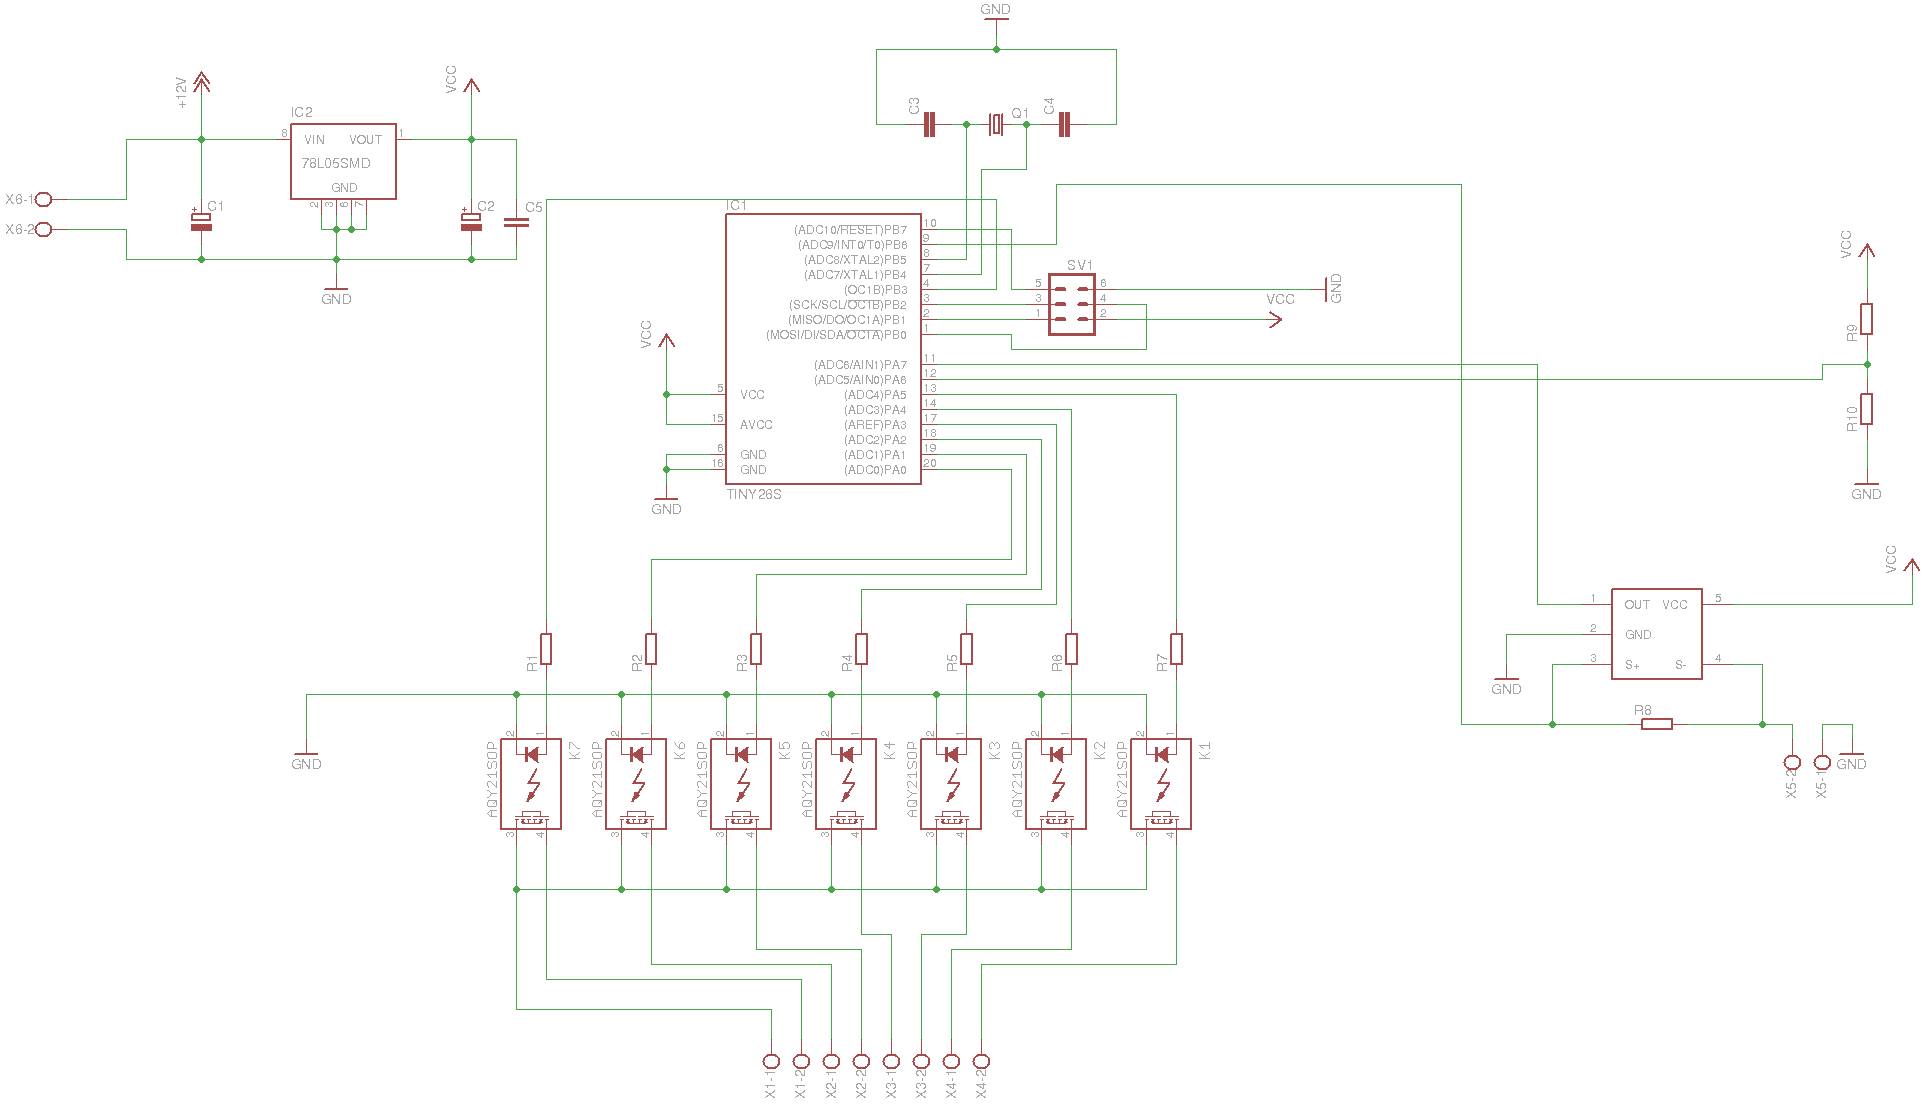
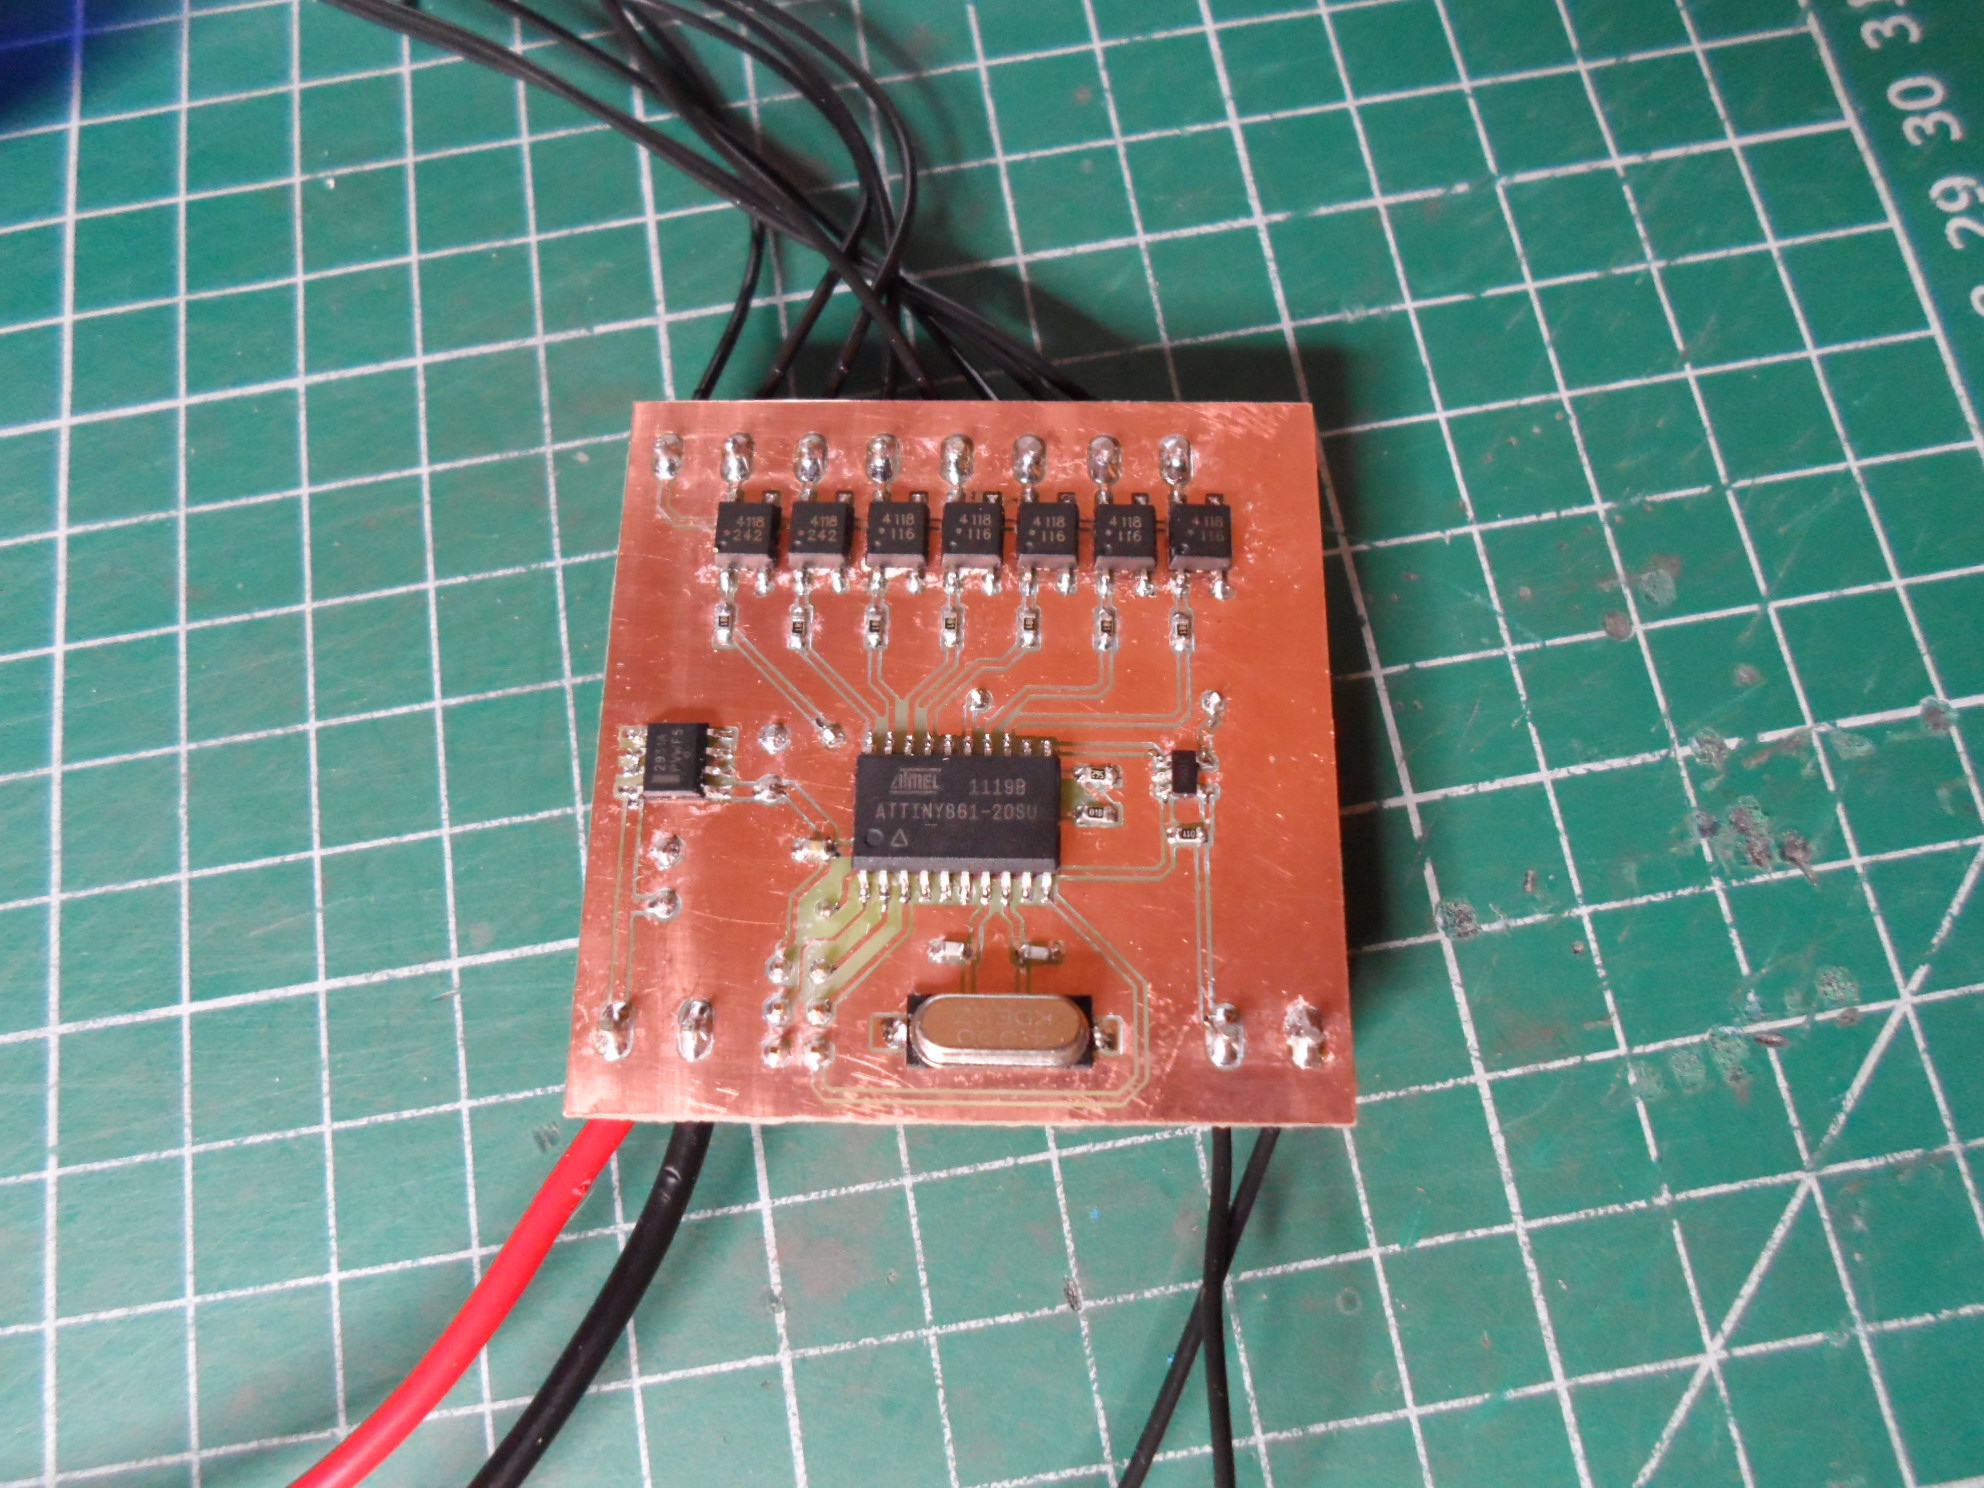
The controller hardware is also quite straight forward. At the heart of the circuit is an ATTINY861 microcontroller. The +5v terminal of the sensor is connected to one of the microcontroller pins, which allows the sensor to be power cycled to force a recalibration if it gets stuck on. This power to the sensor also passes through a 1 ohm shunt resistor, and the voltage drop across this shunt resistor is monitored by a specialised current monitoring opamp (ZXCT1086).
The opamp has a fixed gain with its output being 50 times the voltage drop across the shunt resistor. When the sensor is activated it consumes 10mA, so the voltage drop across the shunt resistor is 10mV (0.01V = 0.01A * 1Ohm), and the output of the current monitor opamp is 500mV. This voltage is fed into one side of the microcontroller’s analog comparator, and there is then a simple voltage divider to divide the 5 volts from the voltage regulator to apply a reference voltage to the other side of the microcontroller’s comparator.
The firmware running on the microcontroller is then able to watch for when the voltage from the current monitor exceeds the reference voltage to detect the sensor being activated, and from this it can decide when to send commands to the light.
Finally the microcontroller can activate one of its seven outputs to signal the Rako radio module via a bank of solid state relays.
Demo Video
Watch the light fade on/off in the top right corner when the sensor is touched:
Sensor Files
Browse: repo
Controller Files
Browse: repo
Recent Comments